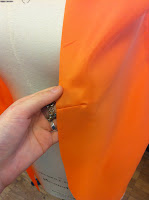
I am now ready to start sewing my garment (woohoo). The first thing I did was sew my darts, with the facing I found this difficult as I had to make sure the fabric didn't bulk. To make the dart sit perfectly I snipped the dart open and pressed open the seams.
The next step was to sew on my flap pockets. First I had to bag out the flap pockets, making sure they are both the same, trim the corners and poke through, using the point turner and roll the seam. Then I needed to close the open side. As I had made sure I had marked on the front piece. Start sewing where the drill whole is 1cm inside finish length. Stitch under flap on the top, and sew right to the edge. Make sure there is fusing on the wrong side of the fabric where the pocket will eventually be. Then with the pocket bag lay it out level with the stitch line, leaving seam allowance on either edge. Sew on the wrong side so you can see clearer. I fused a piece of fusing onto the pocket bag for more strength. Then cut the front piece in a straight line which I will then push the jet through. I also had to make lining with the pattern of my pocket bag with a piece of my fabric sewn neatly onto it, which will be the inside of the pocket. Bag out the pockets, cut to diagonal so that you can poke the jet through the already cut line.
The next step was to sew the two centre back pieces together and again press open the seams. Then sew the sides seams together, as I had a curve in the seam I had to make sure I sewed accurately matching all notches. Then the shoulder seams, easing the dart in nicely.
Now time to make up my sleeves, as my sleeves are in two parts. I sewed all the side seams together and then put the under sleeve into the top sleeve and sewed around the circumference, easing in all the material, again pressing open seams. Then gather the sleeve head and ease it into the armhole of the jacket, matching all notches.
Now I am ready to sew my facings together, at first I sewed with a twist so i just had to make sure that all the shoulder seams match together and the sides are facing the right way. With the front facing sew only up to the first notch as I will need to set in my collar. With the facing make sure that I sew to the corner, neatly so that I can poke the corners through neatly and accurately. Again pressing all seams open.
Roll the seam back until the break point and then roll in the other direction so that you cannot see the seam on the rever.
Now time for what I had been dreading the most, the collar! Attach facing to front and start at side seam, matching all notches. Stitch up to the break point, there will be a difference between the facing and the front, the facing is bigger. Match the notches and ease it in. Trim off the corner. Press using the point turner, press the seams open until the break point and trim the seams. Then turn the facing through and press so that it rolls so you can just seam the seam. When you get to the curve the roll the hem and carry on rolling up to the break point. Once this is done I need to anchor the neck seams together, start at corner of neck round to the centre back.. Then stitch all open seams together.
Once everything has been pressed BEAUTIFULLY I now need to set in my lining. Linings add 'body' and warmth and quality to the finished garment. The lining is an inner shell is made separately. The lining must be made and contracted at the same level of the actual jacket. The lining must never be tight and must have an extra tolerance, which is added to the pattern. Make the lining up how I made the jacket, leaving an open gap in-between the seams of the sleeve so that you pull it through after it has been set in. Make sure the sleeve head roll and shoulder pad is in and the adhesive tape on the hem. By mistake I sewing the darts in before setting it into the lining so for next time I must remember not to do that.
Setting the lining in, so making sure the jacket is pressed perfectly as once you set the lining in you cant go back in and press any creases, it will be very difficult. Sew right side to right side, around facing. Make sure you form a back pleat, fold from notch to notch. Press seam into lining with no steam. Turn right sides together and bag out lining to hem. Everything is turned inside out at this point. With the front edge, right side to right side, attach lining across the hem. 1cm above the 4cm hem, all the way across. Catch the hem in the seams. The final stage of the lining, lay lining on the sleeve, hem to hem. Anchor facing sleeve to the shoulder pad, then underarm notches together and do a couple of stitches, pull the whole jacket through the space that was left in the sleeve and close the hole in sleeve and it is DONE. press it all together and HAND IN.


